Before & After Transformation: Sisal Stair Runner

When designing any space, it’s easy to focus on the larger elements of the design like the layout and main furniture pieces, while losing track of all the small details that really complete a design. Without attention given to the details, a design will end up looking amateur and incomplete. In today’s before and after transformation, we’ll be showing you how one seemingly insignificant detail can really change an entire design’s aesthetic and functionality.

The Space

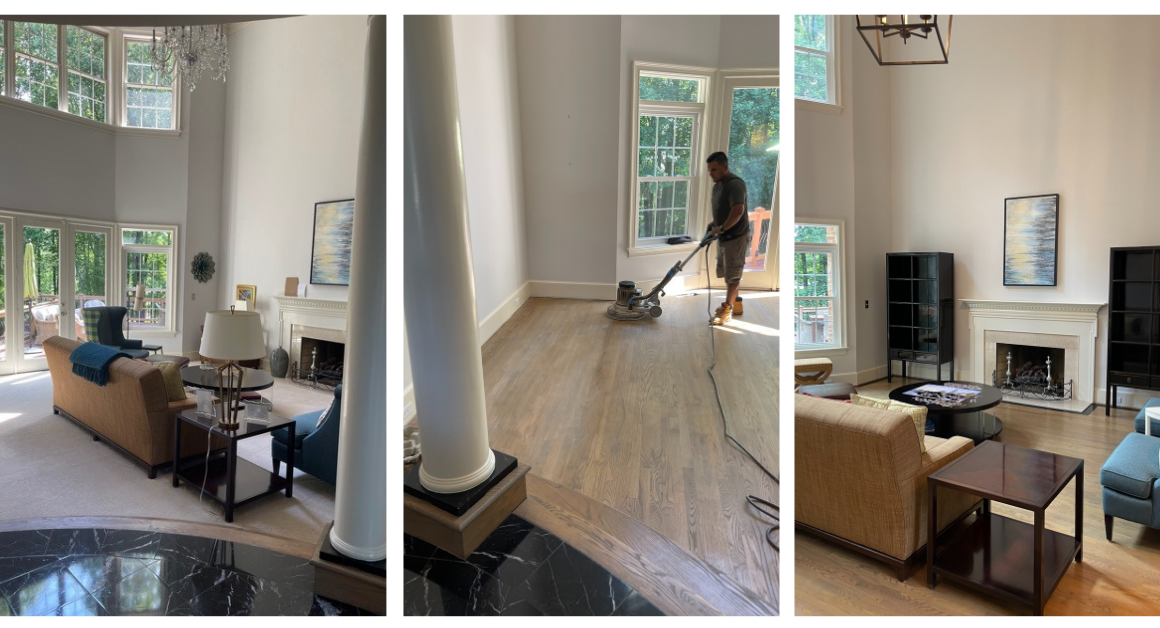
As you may know, if you’ve been following our blogs, I’ve done quite a bit of work recently on remodeling a beautiful house in Great Falls, Virginia. We redid their entrance, dining room, home office and lighting throughout the house, and more. We have also done quite a lot of work on their living room, which leads to a beautiful winding staircase. As we completed smaller sections of the house, we knew that we could give attention to the elements that connect each space, this stairwell being a prime example.

The Before

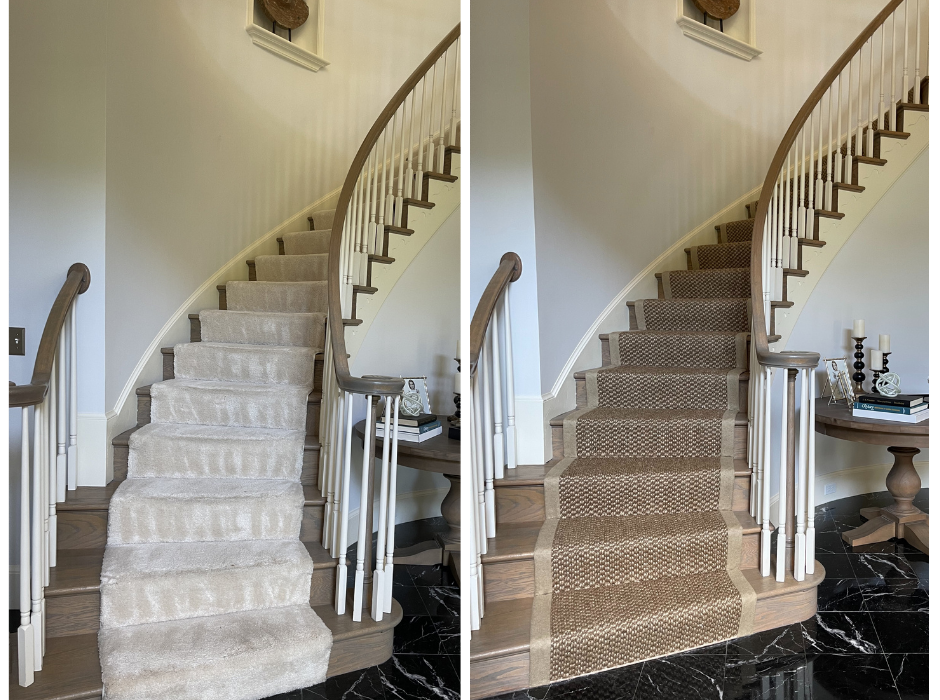
The original design had a very fluffy beige stair runner on these gorgeous steps. The fluffiness of the carpet didn’t match the chic aesthetic of the rest of the house. The stairs stood out – not in the way you want them to. They looked quite dated against the lovely black marble floors and created too much contrast against the wooden stairs. When looking at the design, you might not initially realize how much of an eyesore this stair runner actually was – it was a relatively small detail compared to the entirety of the house, and the tone of the carpet wasn’t completely off. However, I knew that we could complement the stain of the wood better, in a way that would ultimately be more beautiful and more functional.

The Why

There are a number of reasons why I think sisal is the best material for stair runners – stairs get so much foot traffic, that a carpet like the one originally there would get worn out quickly and end up looking dirty. Sisal on the other hand is incredibly durable and holds up well through time. Additionally, sisal has a better grip which will make the stairs easier and safer to use – especially for those who are at risk of falling and getting seriously injured. But beyond practicality, a huge design trend at the moment is bringing nature inside. There is something so beautiful using a natural material like sisal in such a modern house – it grounds the design and offers something different for the eye to land upon. It’s no surprise then that as soon as I saw this stairwell, I knew that a sisal stair runner would be the right choice.

The After

We opted for a runner that had a lovely two-toned pattern with a thicker binding on either side in a lighter color. The binding on the sisal provides a lovely contrast to the darker wood, and the light pattern keeps the look interesting. However, all the tones in the sisal are much closer to the tones of the wood, in comparison to the original carpet. Making the contrast more subtle means the eye can enjoy the winding structure of the stairs more and appreciate the contrast already provided between the neutral walls/trim and the wooden stairs. 

The Takeaway

I am so happy with how this transformation ended up, and more importantly, my client was happy. Take a look at the before and after photos and see the massive difference it made! The sisal looks far more intentional and thought-out. Design is like any other art: each detail matters and deserves equal attention to the rest of the work. If you are designing a home and think you may be missing out on important details, let us help you! Head to our services page to book your free consultation today!


Small Modern Bathroom Designed for Boys

We are back with another home renovation and this time we are moving to the bathroom – specifically a bathroom that will be used by two young boys. Design is all about the marriage of functionality and beauty. Whenever I design for kids, I make sure to spend extra time with the function of the design, as children have different and unique needs to be catered to. Keep reading to discover this incredible modern bathroom transformation for boys!

Before We Begin

When looking at the before photos, it’s clear that a lot of work needs to happen – especially aesthetically. Bathrooms are one of the areas of the house where, even if the entire room has been cleaned properly if it looks old or outdated, something about it doesn’t feel clean. Bathrooms are also really susceptible to water damage and mold, so it’s always a good idea to make sure nothing needs to be treated before beginning the actual design. For both of these reasons, we decided to gut the entire bathroom and start fresh – my preferred way of remodeling bathrooms. 

My contractors and I got to work tearing out the old bathroom. Thankfully we didn’t find any terrible water damage, so this process was relatively quick and pain-free. Now is where the real fun begins.

Laying the groundwork

Because we cleared out the room down to it’s studs, we had to do some prep before the transformation could start. We installed cement boards on the walls before installing the tiling. This is important for a few reasons – it gives you the necessary flat surface needed to attach the tiles, and it protects the wood below from any possible water damage. Once those were up, we got to work tiling the bathroom and installing new floors. We kept the design relatively simple and neutral for practicality’s sake. Although young boys might find spiderman wallpaper more exciting, the client and I both agreed to keep it classy so that the boys don’t absolutely hate it as they get older. We chose a simple dark grey 4 x 12 tile for the shower/bath area to provide contrast with the wall color we would eventually use. The floors we chose are simple light gray large 12 x 24 tile. Choosing a large tile for the floor made the small bathroom seem that much larger.

The Shower

The plumbing is, without a doubt, the most important part of any bathroom. We decided to keep the same general layout of the original bathroom for ease, to avoid having to reinstall all the pipes. We started with installing a built-in bathtub with a shower to give the boys options. Next we replaced the original shower curtain with sliding shower doors. Shower doors mean no mildew, never having to change or replace the shower curtain, and a dryer bathroom. We also installed towel rods onto the shower doors so the boys would have no excuse not to hang their towel up! 

The Toilet

Next we put in the new toilet. Because two children were going to be using this toilet, we chose one from Toto Toilet that has a special finish on it called Sani Gloss to help keep the bowl clean. Any parents out there will know how difficult it can be to get your children to help with the cleaning, so we felt this was the best and safest option. We chose a toilet that was simple and white.

The Vanity and Sink

All that was left to do plumbing wise was the sink! We knew we wanted to build a custom modern vanity for this room. The previous vanity was very large, making the rest of the bathroom feel very small. We decided to downsize and avoid the all-white look. So we built a vanity with a cabinet that floated on the wall, slightly above the floor. We chose a floating vanity to create the illusion of a larger space. It also makes cleaning easier, with the floor below the vanity accessible, avoiding trapped dust. We installed a beautiful light colored marble counter on top, with a large modern-sink. 

All the plumbing fixtures in this bathroom were done with chrome. Chrome never ages, and looks great. Not only that, but it matches well with pretty much any other color and material. Practical and beautiful!

Finishing Touches

After all the plumbing and the vanity were installed, the most functional aspects of the bathroom had already been taken care of. Now it was just a matter of making it look beautiful. Keeping with the neutral theme, we painted the walls in Benjamin Moore #860 in Apparition, a classic and timeless shade. The vanity also used Benjamin Moore paint, this time in #168 HC Chelsea Gray. Similar in tone to the wall-paint, this darker shade offered a lovely contrast, acting as a bridge between the light colored walls and the dark shower tiles. Finally, we put up a mirror, smaller than the previous, with a simple grey and white striped pattern. We installed a light right above the mirror as a sophisticated detail. 

Final Thoughts

I think the design turned out great, especially considering how practical it is for the two young boys who will be using it. I hope they enjoy their new bathroom now and as they grow up! For more articles on our bathroom renovations, check out our other articles. If you are interested in renovating a bathroom in your home, get in touch today!


Fabulous Find Underneath Wall to Wall Carpeting

Today we are back in Great Falls, Virginia, working with a client to remodel their living room. When I saw the space, I instantly felt that the wall-to-wall carpeting was outdated and needed to go. Wall-to-Wall carpeting can sometimes work, but in most cases, it makes the room seem smaller. Not to mention that wall-to-wall carpeting traps a lot of dust, which is no good for anyone with allergies. The other issue with wall-to-wall carpeting is that it makes it more difficult to split the room up into sections, whereas using rugs allows the floor to be divided up. 

All this to say that the wall-to-wall carpeting needed to go. Keep reading to find out how this first step led to the transformation of this living room floor. 

Tearing Up The Carpeting

My lovely contractors and I got to work tearing up the old carpet. It had been installed in sections, so we began removing each carpet piece, the padding, and the tack strips. And guess what we found?! The most beautiful hardwood floors that I knew would look stunning with a bit of TLC. The wood was in great condition and just needed a little restoration and detail work. I was relieved to see this because when removing the carpet you don’t always know what you’re going to find underneath. Oftentimes, it reveals damaged or molding floorboards. We were all so delighted to find the beautiful woodwork.

Preparing the Design

As soon as my client and I saw the beautiful wood floor, we knew it was going to stay. But I knew some detail work would take this from a nice living room to a stunning living room. The living room is two steps down from a landing that features black marble. There are pillars around this landing that stand on black bases. When set up with furniture, the room had two beautiful black cabinets and a lovely modern black coffee table. I wanted to incorporate this black accent color into the floors for continuity in the design, so I planned on giving the floors a black-painted border. With all that in mind, we could begin the restoration process.

Restoring the Wood

We were happy with the color of the wood and didn’t want to stain it again, so the first step to the restoration process was buffing the floors to prepare them for a wood finish. Buffing is basically where you remove the very thin top layer of wood finish previously laid down, thereby also removing any built-up dust or grime. This process is similar to very fine sanding. My contractors used an industrial floor buffer for the main floor and hand-buffed the stairs. After that, we measured a 4-inch border around the edges of the room, taking our time and being very precise – it wouldn’t work unless it was neat. 

Once the wood was prepped, we laid down a water-based satin wood finish to give the wood that glossy sheen. A water-based satin finish is a great choice for a living space because it is scuff-resistant and easy to clean. The wood is looking really beautiful already!

Finishing Touches

After the wood was restored, the only job left was to paint the black border around the room. Using tape for precision, we took our time with this step ensuring that it was perfect. Once the wood finish and the paint were dry, the floor transformation was complete. We moved all the furniture back into the room, and what an incredible difference the floors have made! The surprise of the beautiful wooden floors below the original carpeting gave way to such a magnificent finished design. The wooden floors make the entire room feel so much warmer. I absolutely love how the black border turned out and more importantly, my client loved it too. All that is missing from this beautiful living room is a nice area rug for the sofas.

Interested in renovating?

If you have outdated wall-to-wall carpeting, it’s time to consider renovating. Changing the floors goes to show that sometimes you don’t need a million changes to transform a room. Oftentimes one key change can make the biggest difference. However, working on floors is always a laborious task because you often need to be on your hands and knees to complete the work. Let me and my team of highly skilled contractors and craftsmen help you! Visit our services page to book your free consultation today.


Kelley Astore Interiors

Expert Interior Design & Renovation Services of Every Style.

Where We Work

Northern Virginia, Washington, DC,
and the Greater Washington Area

GET IN TOUCH
Connect

Privacy Settings
We use cookies to enhance your experience while using our website. If you are using our Services via a browser you can restrict, block or remove cookies through your web browser settings. We also use content and scripts from third parties that may use tracking technologies. You can selectively provide your consent below to allow such third party embeds. For complete information about the cookies we use, data we collect and how we process them, please check our Privacy Policy
Youtube
Consent to display content from Youtube
Vimeo
Consent to display content from Vimeo
Google Maps
Consent to display content from Google
Call Now ButtonCall Us For A Quote!