Flooring: The Benefits of Faux Wood Vinyl

Everyone seems to dream of hardwood floors – and it’s easy to see why! They are so classy, chic, homely, and warm. However, the reality of hardwood floors is that they can be fairly expensive to install and can wear and tear quickly enough to make one question whether they’re worth it. That’s why vinyl flooring is a great option to consider when designing or remodeling any room! Keep reading to learn more about faux wood vinyl flooring and why it might be the best option for you.

What is Faux Wood Vinyl Flooring?

There are two main types of vinyl flooring – the type that comes as sheets and the type that comes as tiles. I always recommend tile vinyl flooring, especially if you’re looking to mimic hardwood floors. Tile vinyl flooring is much harder than sheet vinyl flooring, so will look and feel more like wood. It is made of Polyvinyl chloride which is a synthetic material. You can buy vinyl flooring tiles from most hardware stores, coming in a variety of sizes and colors.

Why Choose Faux Wood Vinyl Flooring?
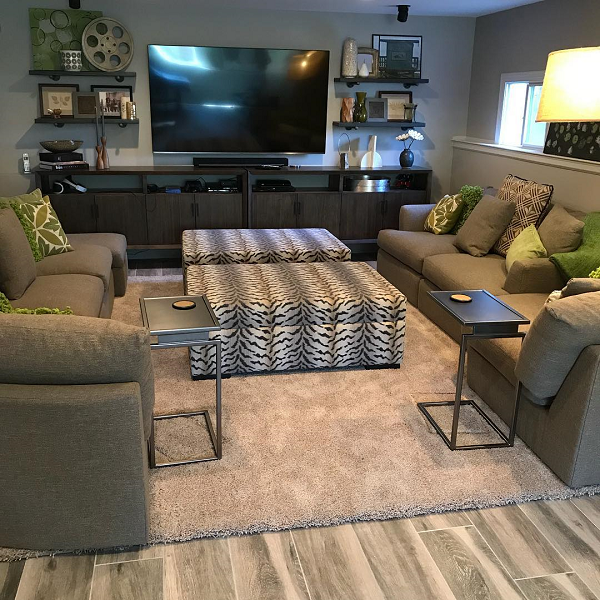
Easier to Maintain

One of the best parts about Faux Wood Vinyl is that it is much more durable and easier to maintain than actual hardwood floors. If a drink spills, you can simply wipe it up with no fear of staining or damage. This is perfect for high-moisture rooms such as kitchens and bathrooms. Additionally, faux wood vinyl flooring doesn’t chip or scratch nearly as easily as hardwood floors do. This makes it a great option if you’re someone with children or if you like to host a lot of gatherings and parties. 
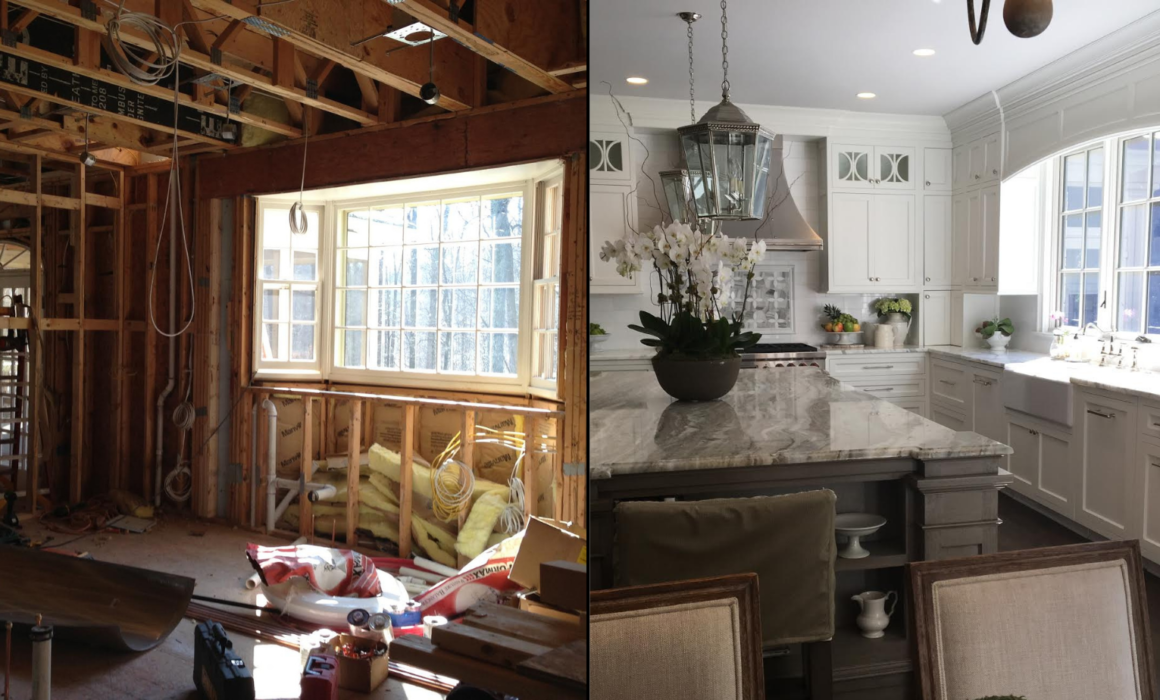
Budget-Friendly

Proper hardwood floors can be incredibly expensive to buy and install. The wood needs special treatment, and the simple weight of it can make it difficult and expensive to install. Not to mention that it requires special varnishes and finishes which just adds to the cost. Vinyl Flooring on the other hand is easy to come by and is designed for quick and easy installation – something that you’d be able to do at home. All of this means that faux wood vinyl flooring comes at a fraction of the cost of hardwood floors. And if you’re renovating an entire room, you may find that every penny really does count. 
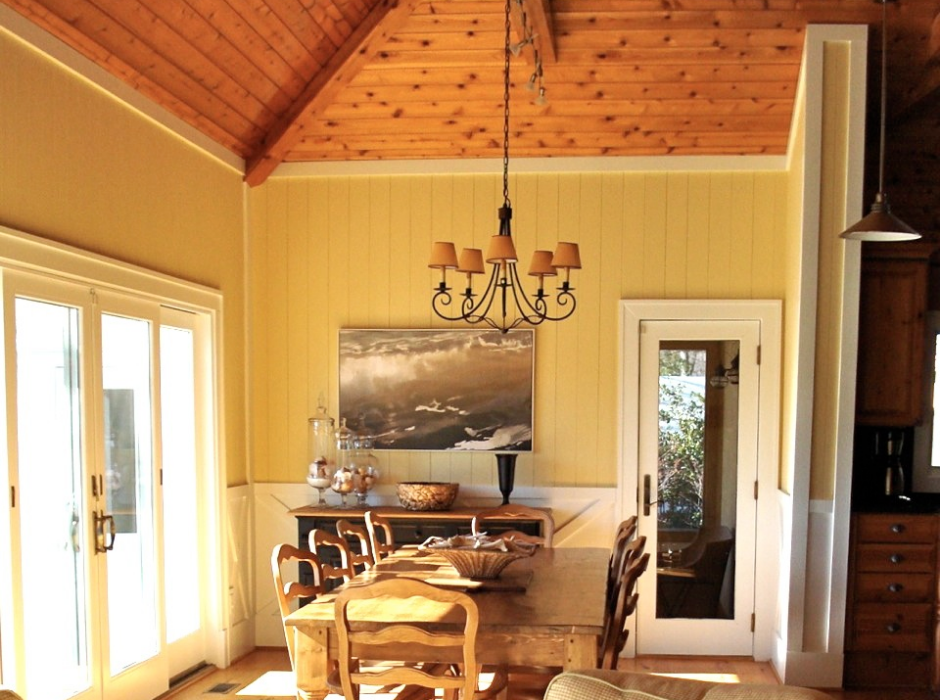
Sleek Look

Faux Vinyl Flooring has the potential to look really amazing when properly installed and incorporated into a design. Most people won’t even think twice about whether or not it’s real wood. The other advantage of vinyl flooring is that it is much easier to find the right color and tone without having to compromise on pricing, thereby giving you more creative control. Additionally, since it’s so easy to come by and is available in so many different shades, you can get really creative and even lay down patterns using a variety of colors. If you are feeling extra creative, you can even use vinyl tiles on the walls, ceilings, or backsplashes!

Interior Design Made Easy

There is no reason to resist something like vinyl flooring because it isn’t “real.” Perhaps you may feel like opting for vinyl flooring is a shortcut or a cheap option you shouldn’t choose. But professionals everywhere, including myself, opt for faux wood vinyl flooring all the time. And we never regret it! 

If you are looking to renovate or need some help with your newly designed rooms, we’re here for you! Visit our services page to book your free consultation today. 


How to Add Interest to a Ceiling

In design, the ceiling is often the part of the room that often gets the least attention – throw on a simple white coat of paint and call it a day, right? Wrong. Would the Sistine Chapel be nearly as beautiful without the paintings done by Michaelangelo? It makes sense that ceilings aren’t given as much attention as the walls, for instance, but if you’ve been following us for a while now, you know that we believe design is in the details. Because the ceiling most often sits in our periphery, it is almost like one large-sized detail. And we know that details make all the difference, with the ability to take a design from pretty to beautiful. So keep reading to find out 4 ways to add interest to a ceiling!

Paint

Paint is probably the easiest way to give your ceiling that detail to make it stand out. Choosing a bold, bright, or contrasting color for the ceiling is simple, inexpensive, and adds that wow factor to a room. Get creative by painting the top few inches of the wall the same color as the ceiling for a seamless and raised effect, making the room appear taller. 

Even just painting the ceiling the same color as the wall can add that edge of seamlessness – although this works best when the walls are painted using a bolder color than white or beige. 

Architectural Detail

One of my favorite and most effective methods of adding interest to a ceiling is adding architectural detail. Whether you decide to install a coffered ceiling, bead-boarding, beams, or a simple trim, actually adding that extra texture really does make the biggest difference. The eye is given something to dance on, being drawn upward, and generally making a room appear taller and larger. 

Architectural detail also gives such a fantastic canvas for any paintwork that you want to do. Contrasting the color of the trim or woodwork to the rest of the ceiling will make a design appear complete and well-thought-out.

Wallpaper

Wallpaper is another easier and less expensive way to add beautiful detail to a room. You can get that Michaelangelo feeling by choosing more extravagant designs, transforming the ceiling from an easily missed detail to the main event. This is a great option if your design is following a neutral color scheme and you’re wanting to add that detail and texture without bold colors or hours of woodworking. Simply choose a patterned wallpaper with colors that match the tone of the rest of your design for a more exciting visual experience.

Stick-on/peel-off wallpaper is also a great choice if you are renting!

Lighting Fixtures

The final way to add detail to the ceiling design is with your lighting fixtures. Chandeliers are a classic way to elevate a design, once again drawing the eye upward. And if you choose the right fixture, it can often be enough to finish the design. And don’t be alarmed by the word, “chandelier.” It doesn’t have to be an extravagant fixture with dangling crystals – although that can very often be the right option. There are so many modern and sleek lighting fixtures large enough to fill the ceiling space without appearing gaudy. 

Combine These!

My final tip is to use a combination of these methods to really bring the ceiling design to life. You are in control of your own design and the most important person throughout that process is you and whether or not you like it. Allow yourself to get creative with all the possibilities! We promise you will not regret giving that attention to your ceiling!

The only difficult thing about adding interest to a ceiling is that it can be quite a difficult surface to work on for obvious reasons – especially if you’re looking to install architectural detail. That’s why we’re here – to help assist you and turn your dream design into a reality. Head to our services page to book a free consultation and get started today!


Bespoke Kitchen Before and After

Kitchens are one of my favorite spots in the house to renovate. I always see the kitchen like the heart of a house – a place where the family gathers – a neutral ground. Having a beautiful large space to prepare and enjoy food supports a healthy relationship between cooking and eating. So I’m happy to bring you through the before and after renovation of a kitchen in Great Falls, Virginia

Getting Started

If you’ve been following our blogs for a while, you’ll know that our favorite way to go about renovations is starting completely fresh. So we gutted the entire existing kitchen, which means that everything in this renovation is completely bespoke and custom made. Looking at the raw space, you can see that it’s a fairly large space – nothing too extravagant, but also not too small by any means. The space has large windows that let in beautiful natural daylight, and I knew that I wanted this design to accentuate that. Having a completely gutted room is like having a blank canvas. The possibilities are endless and your imagination is free to run wild. Which is what we did.

Planning The Design

The first step in any design process will be planning. We knew that we wanted the kitchen to follow a neutral color palette, and we also wanted it to feature marble. Thankfully we found two different types of marble. The first one was very veiny marble that features a lot of sandy, gray, and white tones. This marble would eventually become the kitchen island. As for the rest of the countertops, we went with a more subdued marble that was less veiny. It was perfect for what we had in mind. After we chose which marble to use, we could plan the rest of the design around that. 

Custom Cabinets 

The first thing we tackled were the custom cabinets. We started by installing the hanging cabinets along the walls first. Afterwards we installed the lower cabinets, the kitchen island, and the pantry. All of the cabinetry had to be installed around where the kitchen appliances would eventually go. The island was built in different segments before being topped with marble. When designing the island, we made sure to build in shelves, drawers, and cupboard space for extra storage. It is so extremely important that a kitchen is designed to be practical and functional because everyone in the family spends so much time in the kitchen.

To provide contrast, we went with two different colors of paint/stain for all the custom cabinetry. For all of the cabinetry along the walls, we opted for a pale gray stain color. As previously stated, we wanted to accentuate the natural light from the window, so featuring plenty of this light color would really help brighten the room up. We decided to introduce contrast in order to balance the design. We did this by choosing a darker gray/green stain for the island. I love the way it turned out.

Lighting & Appliances

Next on our list were all the kitchen appliances. We installed the sinks, stove, oven, and other appliances. The vent-a-hood above the stove is a stainless custom design. We installed the marble backsplash and the custom-designed marble piece above the stove to offer some texture for the eye to land on. Finally, we installed beautifully polished nickel lanterns hanging over the island from Vaughan Designs. We attached polished nickel hardware to all the cabinetry, then put the bespoke custom-made barstools around the island and the design was nearly complete! All that was left to do was decorate the countertop with beautiful vintage English Ironstone pieces. 

More where this came from…

I absolutely love how this design turned out and my client loved it just as much. It feels modern, clean, chic, and welcoming! If you are debating whether or not to renovate, check out our article on the perks of a kitchen renovation to help you decide! 


Kelley Astore Interiors

Expert Interior Design & Renovation Services of Every Style.

Where We Work

Northern Virginia, Washington, DC,
and the Greater Washington Area

GET IN TOUCH
Connect

Privacy Settings
We use cookies to enhance your experience while using our website. If you are using our Services via a browser you can restrict, block or remove cookies through your web browser settings. We also use content and scripts from third parties that may use tracking technologies. You can selectively provide your consent below to allow such third party embeds. For complete information about the cookies we use, data we collect and how we process them, please check our Privacy Policy
Youtube
Consent to display content from Youtube
Vimeo
Consent to display content from Vimeo
Google Maps
Consent to display content from Google
Call Now ButtonCall Us For A Quote!