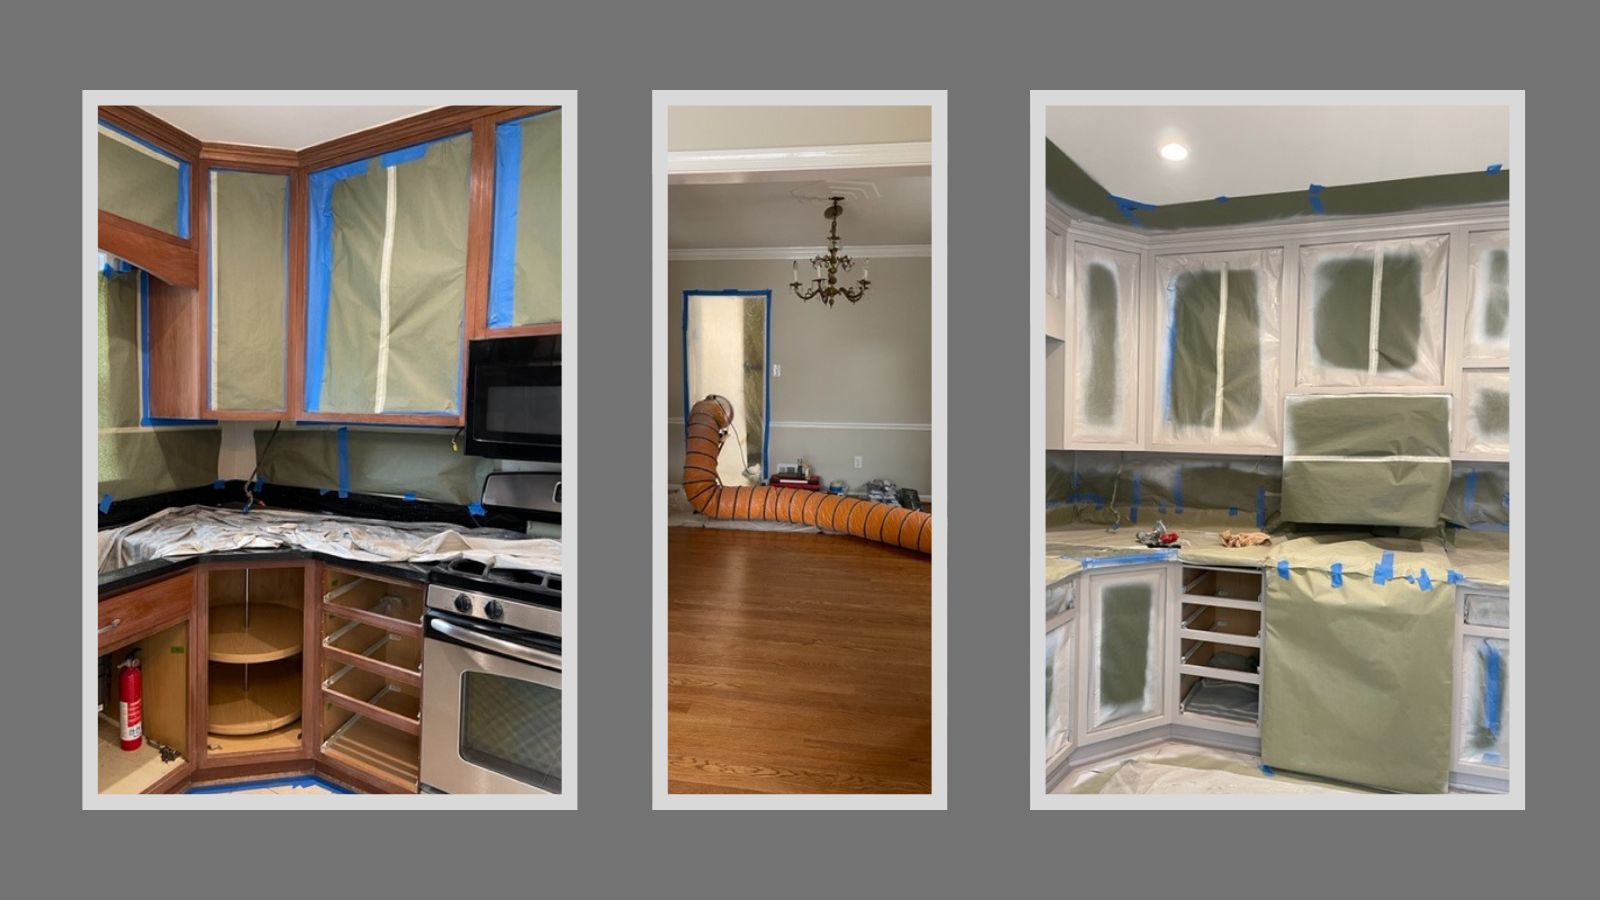
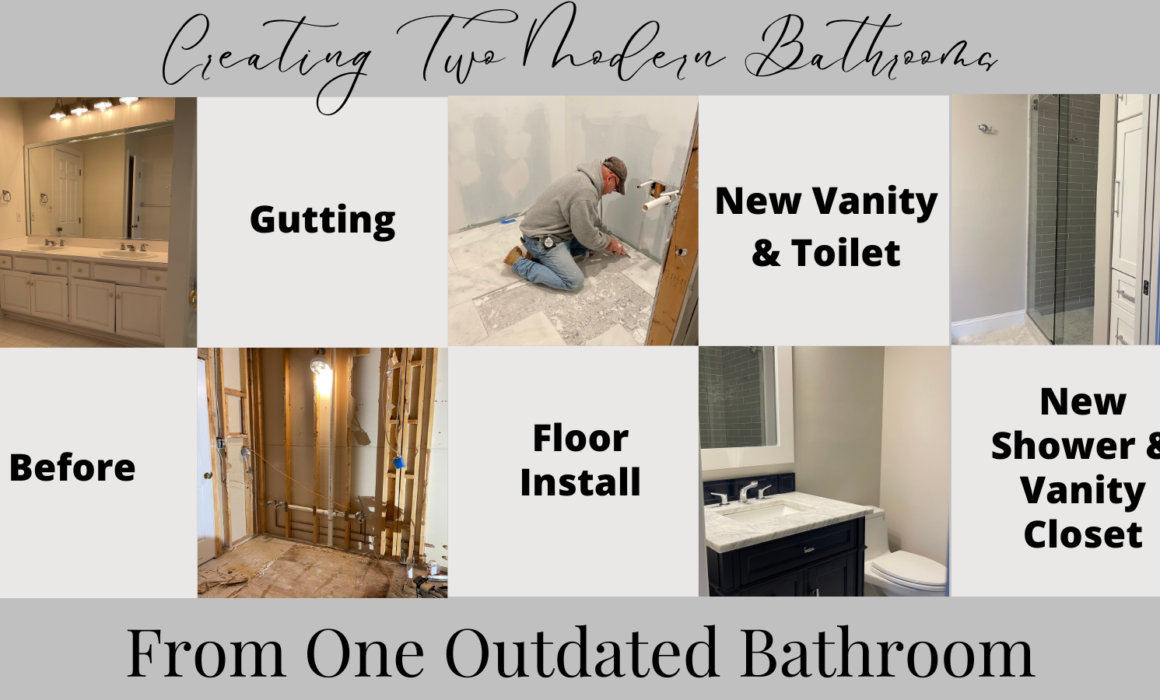
Creating an Extra Bathroom from One Outdated Bathroom

We started out with one very large outdated bathroom that was shared by two brothers and renovated it into two nice size updated en-suites and therefore creating an extra bathroom.  Each young man received his own vanity, toilet, large shower, and vanity closet.  Plus, having an en suite bathroom in each bedroom increases the value of the home!

The first step in the renovation process was to gut the entire space.  This left us with one large blank canvas allowing us to design two bathrooms.  After the new floor plans were in action, we reworked the electrical and installed the new plumbing. 

Then, we installed the shower tile and bathroom flooring. The bathroom flooring is large 12 x 24 tiles of white marble. Also, we had enough space in each bathroom to install a custom-made vanity closet that added quite a bit of extra storage.  

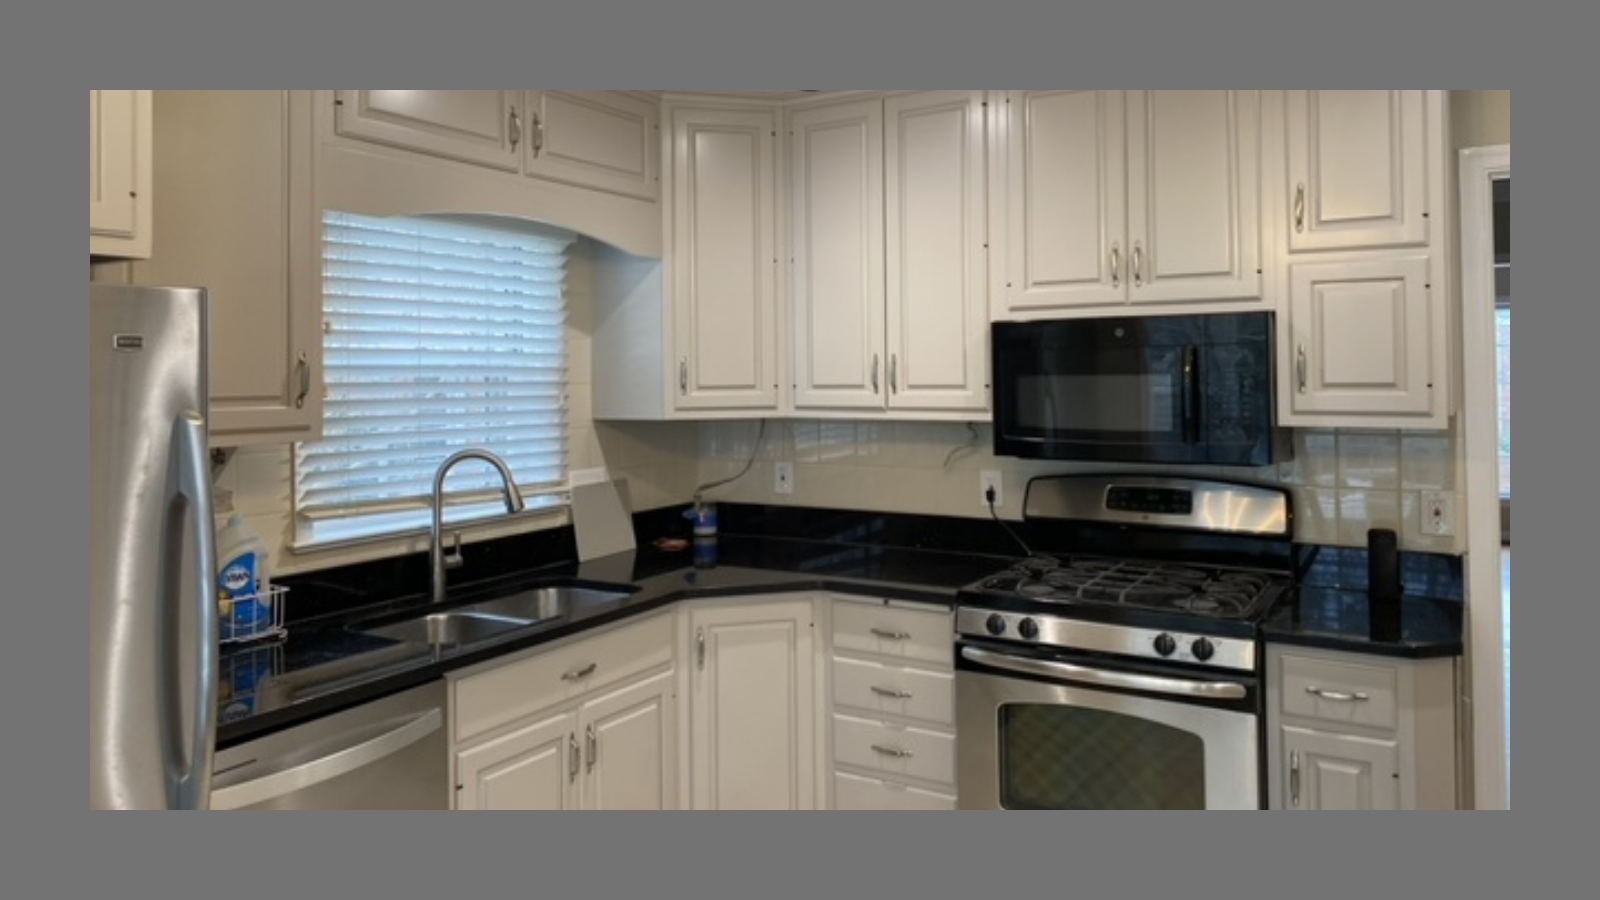
The finishing touches were a brand new toilet, sturdy vanity with chrome finishes, and a large mirror with plenty of lighting above.  This was my first time taking one bathroom shared by two brothers and turning it into two fabulous private bathrooms. I know each young man will enjoy having his very own bathroom and their parents will appreciate the increased value of their home!

How does adding an extra bathroom increase the value of your home?

In some markets, having an extra bathroom can increase the value of your home by 20%… wow!  The amazing aspect of this bathroom renovation is that we did not have to take away any square footage from the bedrooms to make this happen.  We simply made better use of the space that was already present.  This addition not only added financial value to the home but family value.  Now, each young man has his own shower and toilet so the household can run more efficiently because neither child is having to wait for the other brother.  It also prevents arguments; those of us who have shared a bathroom with a sibling know what I’m talking about!


Upholstered Custom Made Bed

Most people spend around a third of the day in bed: sleeping, watching TV, reading, etc. So why not have a bed built for royalty? When you create a custom-made bed, the possibilities are endless; you are able to choose the shape, upholstery, and finishing details.  Plus, they are one-of-a-kind pieces that can be designed to meet precise specifications and squeeze into tight spaces, such as between windows.

Steps in Choosing a Custom Made Bed

Headboard Style

If you are wanting to add several pillows to your bed and design around the room, you may opt for a simple sleek panel. On the contrary, choosing a wingback design can give the bed dimension, generating a focal point to the bedroom.  

Headboard Shape

A rectangular headboard provides clean lines and a clean palette; this shape can maintain serenity in the room.  Due to its neutral stance, it provides the flexibility to change out bedding, pillows, and decor.  Still a simple design but giving the bed an enhancement is slightly arching the top of the headboard.  To undoubtedly make your bed the centerpiece of the bedroom, choose a custom shape… think fleur de lis; it definitely does not have to be that extravagant to draw the attention of the room, a few curves are enough to satisfy.  

Headboard Height

  • Low Profile: 36-48″ H
  • Average: 48- 60″ H
  • Above Average: 60-72″ H
  • Tall: 72- 80″ H
  • Oversize: 81″-120″ H

Headboard Only vs. Custom Bed Frame

There is the option of attaching your custom-made headboard to an ordinary bed frame and electing to have a bed skirt cover the box spring.  Or there is the choice of a custom-made bed frame. These are designed to match the headboard and can be built to support your mattress (platform), mattress, and box spring (standard), or to cover them (adjustable mattress foundation).  To give the bed a more complete look, a matching footboard can be added.  These sit up slightly higher than the mattress and excel in keeping comforters on the bed.

Custom Made Bed Finishing Touches

The exciting part is choosing the upholstery!  Will it be velvet, leather, or natural fabric?  Then there is the color, are you going to go with a neutral color or a vibrant color or pattern to really make a statement?  You can have the fabric pulled smooth and tight across the bed or there is the option of adding tufts.  I think that the icing on the cake is the addition of nailheads and usually choose the same metal finish that is used throughout the room.

My Custom Made Bed Projects

Custom Made Upholstered Beds

This bed was upholstered in a gray velvet by Kravet.  As you can see, my upholsterer made the base of the bed the exact size of the box spring and mattress and it flows seamlessly with the headboard.  There is a slight arch to the headboard to conform to the classy appearance of the bedroom.  

Custom Made Upholstered Beds

We kept the style of this custom bed simple and chose an eye-catching fabric to make it the focal point of the bedroom.  The finishing touch of the nailhead trim perfected this chic design.

We are able to make beds per our customers’ requests so we have the ability to set the desired ambiance in any bedroom.  My team and I make our masterpieces to last a lifetime so that a third of your life is spent in the bed of your dreams!


Kitchen Cabinet Refinishing: Cherry Stain to Beautiful Gray

The kitchen was fairly up-to-date with new black granite countertops and stainless steel appliances.  However, the cabinets needed an updated touch!  They had a cherry stain that completely clashed with the rest of the kitchen so we decided to refinish them.

Steps to Refinishing Kitchen Cabinets

The first step in revamping these cabinets was to remove the doors and drawers.  They were sent to my carpenter’s shop to be sanded and primed.  Then, they received two coats of finished lacquer.  The chosen paint color was Ben Moore AC-34, also known as Cape Hatteras Sand.  It is part of an interesting collection, America’s Colors, of soft neutrals that “snapshot America’s most popular, well-traveled regions” making it a very welcoming choice.

While the doors and drawers were in the shop, my guys began with taping off the inside frame of the cabinets so that no paint would get in.  Additionally, they taped around the appliances to make sure they were protected.  My team sprayed the first coat of primer before spraying two coats of finished lacquer.  Lacquer paint has a strong odor so we ventilated the area with a fan and a long tube that exhausted the fumes outside of the house. Once completely dry, the paper and tape were removed and the doors and drawers were reinstalled. 

Kitchen Cabinet Refinishing

The Finishing Touch

It was a surprising reveal, amazing how much different a space can look when the correct colors are present!  The gray cabinets with stainless finishes blended seamlessly with the black granite countertops, stainless steel appliances, white backsplash, and light-colored floors.  Something as modest as refinishing the kitchen cabinets gave the entire kitchen a brand new look without having to completely renovate the entire room.

Kitchen Cabinet Refinishing


Kelley Astore Interiors

Expert Interior Design & Renovation Services of Every Style.

Where We Work

Northern Virginia, Washington, DC,
and the Greater Washington Area

GET IN TOUCH
Connect

Privacy Settings
We use cookies to enhance your experience while using our website. If you are using our Services via a browser you can restrict, block or remove cookies through your web browser settings. We also use content and scripts from third parties that may use tracking technologies. You can selectively provide your consent below to allow such third party embeds. For complete information about the cookies we use, data we collect and how we process them, please check our Privacy Policy
Youtube
Consent to display content from Youtube
Vimeo
Consent to display content from Vimeo
Google Maps
Consent to display content from Google
Call Now ButtonCall Us For A Quote!