
Refurbished & Renewed: Upcycling a Dining Room Cabinet
As we continue with our renovations, today we’re bringing you a dining room cabinet transformation! When remodeling a room, it can be tempting to simply get rid of all existing furniture and start fresh. Not only is that very expensive, but it’s also incredibly wasteful! According to the EPA, nearly 10 million tons of furniture and furnishings in America were sent to landfills in 2015, with that number accelerating each year. As interior designers, we have a duty to try and complete our work in a more sustainable manner. But what do you do when you’ve already have a piece of furniture but it doesn’t fit the new design? Upcycle it! It’s amazing what a few small changes can do to a piece of furniture, and this cabinet is no exception. Keep reading to learn more about the upcycling process and watch as we transform this dining room cabinet!
From Start to Finish
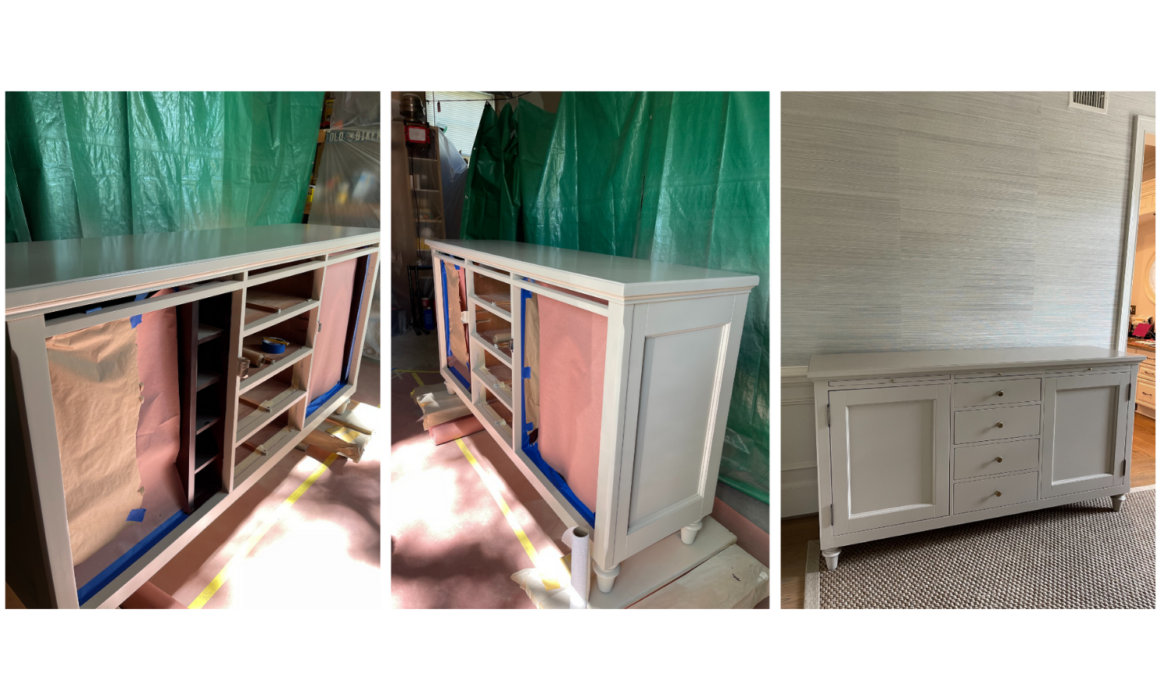
We started off with a large cherry cabinet that featured polished brass hardware. The piece and the wood were in great condition and it was clear that this was a well-crafted piece of furniture with a lot longer to live. It simply felt wrong getting rid of such a beautiful piece…not to mention expensive! However, we knew that we were planning on installing grasscloth wallpaper and the cherry-toned wood was not going to match the design. The dining room this piece was going to live in longed for a neutral-toned item in its place. That’s why we decided to refurbish it and paint it a taupe color.
In order to do this, we had to start by removing the original wood finish on the piece. We started the work by sanding the entire cabinet. Once that was done, we spackled any holes and then prepared to paint. Before we could actually paint with the taupe color, it was really important that we primed and prepped the cabinet properly. If you don’t go through all the necessary steps and if you don’t use the correct type of primers and paint, you’ll end up with an uneven paint job that will be chipped and scraped away in no time. And there’s no point putting in all this effort if we don’t do it correctly the first time around.
We made sure to get rid of all the dust from sanding, then we primed the wood. After it was primed and prepped, we began painting with a hardening lacquer paint. It’s important to use lacquer rather than ordinary wall-paint on wood to ensure a durable and hard surface. After we painted, we varnished with a polyethylene finish. This was to ensure a glossy smooth surface to the cabinet – great to look at and touch! It was definitely a lengthy multi-step painting process, which is why I’m so happy to have the best team by my side, helping me achieve all these transformations! Once the painting was complete, we added a few final touches. We replaced the polished brass hardware with antique brass, which we felt added lovely contrast to the modern taupe color. I think the finished cabinet turned out beautifully, and more importantly, my client agrees!
Tips for Upcycling Furniture
If you decide to upcycle a piece of furniture at home, be sure to do your research and take your time! Plan ahead and make sure you have all the correct materials and tools to correctly prep your piece before the creative work begins. This is key to ensuring a professional finish and a long-lasting life. Let your imagination run wild and allow yourself to get creative. Learning how to upcycle furniture is a fantastic way to save money (and be an eco-friendly designer!) Even if you are moving into an unfurnished house, you can peruse thrift stores and second-hand shops to find furniture for fantastic prices. You can then transform the pieces to fit your design needs.
Learn more…
If you’d like to learn more about upcycling and refurbished furniture, check out our blog on the benefits of bespoke upholstery!