My Favorite Way to Start a Design: Tips and Tricks for Rugs

Whenever you’re designing a space, one of the first decisions you’ll need to make is your color palette. Your client might tell you featuring colors they want, but unless you’re well versed in interior design, it can be difficult to know what shades and tones to choose – what unexpected combination will take the design to the next level. And I’m here to give you one of my secret go-to tricks that will ensure your design palette comes together seamlessly. 

My Secret

…Start with a beautiful rug! This will allow you to match all your paint swatches and fabric choices right up against the rug. You can choose tones that compliment or are similar to tones in the rug, which will then build the foundation for the rest of your palette and design! Oriental and Persian rugs are so intricate and, although you might not realize it when you first look at them, feature so many different colors and tones. That’s why using it as a base for the rest of your design is almost like a life hack. Let’s take a look at an example from a project earlier this year.

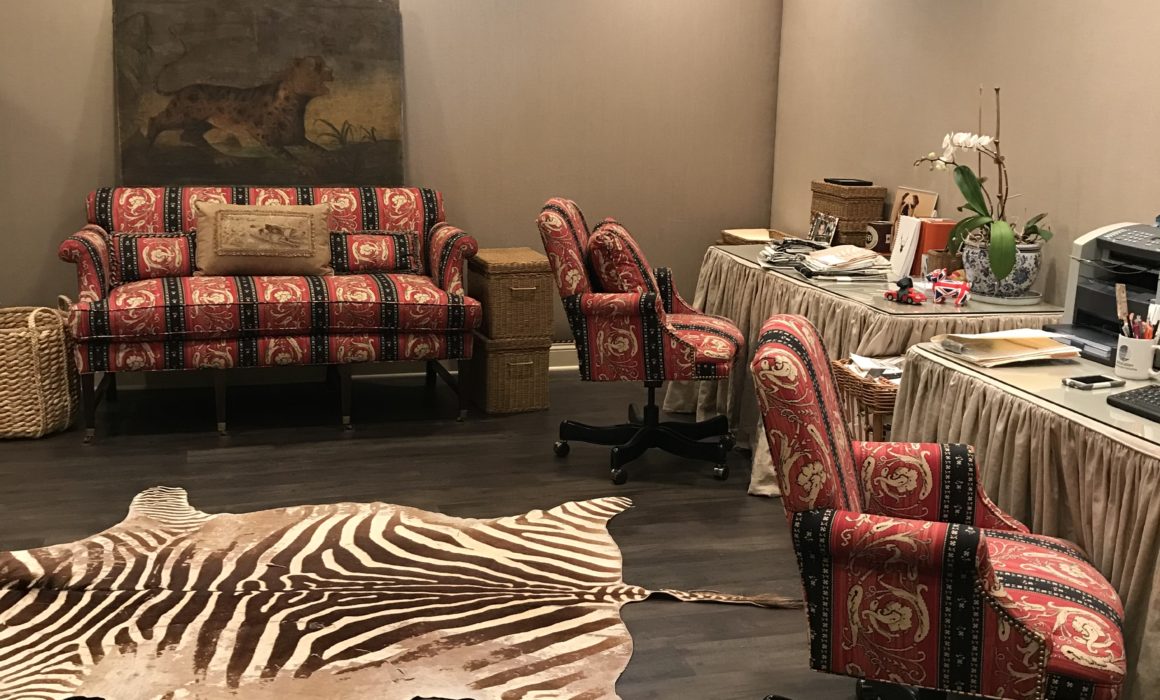
A Rug for a Home Office

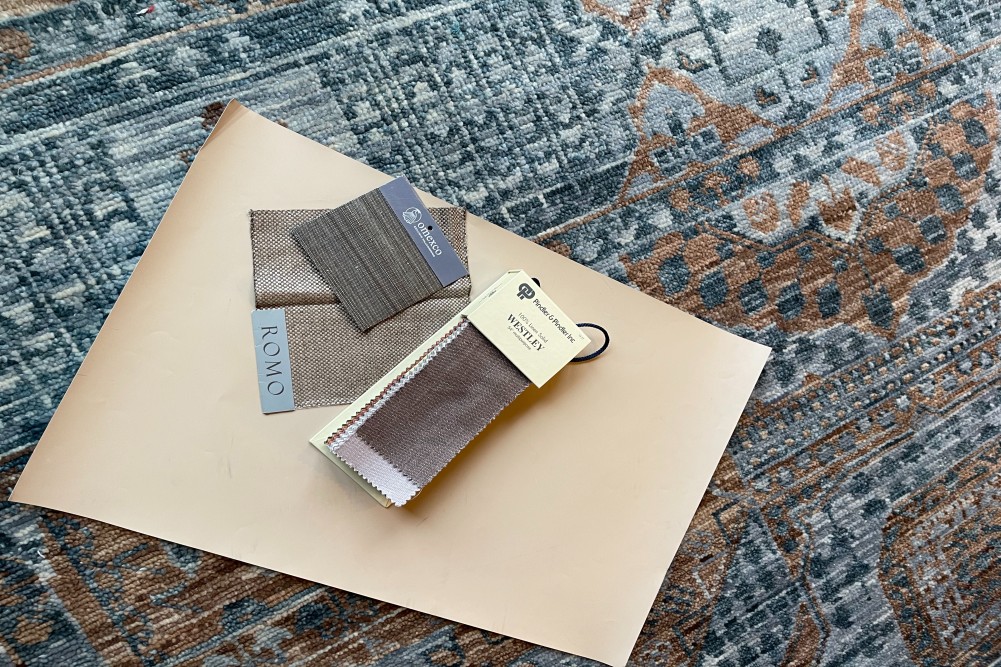
I designed a home office for a gentleman in Great Falls, Virginia. We started with a beautiful rug that both the client and I loved. When you first look at the rug, the stand-out color is blue. But upon further inspection, you begin to see all the beige and mocha details and tones. There are actually many different shades of beige and mocha, which gave us a lot of options on the direction we wanted to take. If we were going for a moodier design, I would likely be drawn to the deeper caramel browns in the rug for the wall colors. However, this was for a home office, so I wanted the room to be a place that felt inviting to work in – full of natural light. Additionally, the color of the wood floors was already similar to the mocha colors in the rug. To contrast this, we focused on some of the lightest tones of sandy beige in the rug and found a paint color that matched and complemented this. We then decided to match the fabrics to the darker shades, working as accents, without taking away any of the airiness of the room. 

Taking this approach meant that when the final design came together – the blue was able to stand out even more against all the colors in the room that were complimenting it. The rug became a statement that made sense.

Tips for Finding the Perfect Rug

We know what you’re thinking….it’s all great, but how do you even find a good rug to start with?! 

Budget

The first thing to consider is your budget. The best rugs will be handmade, so money is definitely something to consider. Beautiful rugs can get expensive pretty quickly. However, they do so much for a design that I would encourage you not to be afraid of spending a good portion of your budget on the rug – especially if it will be your color palette. This is another reason I often start with the rug – it should never be an afterthought. You don’t want to leave it to the last minute and then discover you can’t afford it! 

Size

The next thing to consider is size – will it cover most of the floor? Just a seating area? Underneath a coffee table? If your budget is tight, you can try to find a rug with a smaller surface area – that way you can still get the punch and palette of the rug without breaking the bank. 

Material

I always recommend going for woolen rugs, as they are much more durable. Woolen rugs can be put in high-traffic zones and still look fresh years down the line. Other materials wear down quickly with foot traffic and can end up looking fairly drab. 

See it in Person

My next tip is to simply google any rug show-rooms near you and make a day out of it! If you’re working with a client, ask them to come with you! It is impossible for me to tell you which rug to choose because each one – especially the handmade ones – are unique. You’ll know what the right rug is when you see it. 

Work with a professional

Lastly, if you are still struggling, there is no shame in working with an interior designer! You may not have the time to select the ideal rug for your project. If you work with a professional interior designer, you can share your preferences and let the expert narrow down the best choices for you. Head to our services page to see how we may be able to help you today!


A Breakdown of My Home Office Design

My home office is one of my favorite rooms in the house. It’s where I do most of my design planning and liaising with clients. I love the work I do, so it’s important for me to have a space to focus and get everything done! Keep reading to learn about how I designed it and what materials I used.

The Layout

The first step I tackled was how I wanted to layout my home office. Because my work is creative, it was crucial that my office catered to that. I wanted it to be a relatively large open space so that I could lay fabrics and create boards with plenty of floor space. For this reason, I kept the majority of the furniture up against the walls to make the space as big as possible. The size also allows me to lay some samples out and view them from afar to get a better idea of the designs I create. I also have a lot of fabric samples and materials that I use, so I custom-designed a large built-in unit with plenty of shelf and storage space. It extends from the door, into the left corner, and all the way to the back wall. This way all of my materials are organized and easy to access while I’m working. I’m not the tallest person in the world, so I added in a small and stylish step stool to reach the higher shelves.

Because I’ve built my business up from scratch, it made sense to have two separate desks to accommodate both my creative designing and business running. One of my desks is where I keep my computer and printer and do all my administrative work. The other desk is where I do more of my creative work, looking at samples, and drawing up designs. Having two separate desks helps me switch from a business mindset to a creative mindset easily. I decided to also add in a settee to take breaks, meetings, and calls, as well as an armchair for when I need a slight change of scenery or when someone is visiting my office. 

The colors

It was important to me that my office was a relatively neutral room that would allow plenty of space for creativity and inspiration. For this reason, I decided on a neutral color for the walls, bookcase, floors, and desk. Rather than painting, I decided to upholster the walls for a cozier and better-insulated space. I upholstered the walls and the desk skirts with a taupe linen fabric from Pindler. I then painted the wall-to-wall built-in unit with a Farrow & Ball color called String. I really liked the subtle contrast it provided with the taupe linen walls, to have some dimension and make the space appear larger. I chose simple dark wood flooring and a neutral trim.

If you’ve been following my work for awhile, you know that I absolutely love red. It’s bold, energizing, and passionate. I knew I needed a neutral space, but if it was too neutral, I wouldn’t want to spend any time there. So I upholstered my two office chairs and my settee in a beautiful red and black striped fabric from a British brand called Hodsoll McKenzie. I love the pop of color it provides! I also love the design of my desk chairs: the perfect combination of a comfortable armchair and a traditional office chair. It’s incredibly comfortable and cozy but is mounted on wheels for swiveling and ease. If your job requires you to sit at a desk for a while, I definitely recommend these! I upholstered the other chair in a red and tan leopard spot fabric from Rose Cummings. I added a few more splashes of red like the red tones in the step stool, as well as my Georgia Bulldogs pennant and art! 

Finishing Touches

To finish the room off I added a few orchid plants, which is one of my favorite flowers to decorate with. There’s one on my bookcase and one on my desk. I added in a fun zebra skin rug to tie the space together, as well as a beige throw pillow and wicker baskets for extra storage. I put one of my favorite paintings of a cheetah above the settee for some inspiration. Last but not least, I added a picture of my beloved dog Dunkin on my desk to keep me company throughout the day! I opted for a glass door so the space didn’t feel too closed off, as there are only a few small windows in this room.

More inspiration

Overall, I am super happy with how my home office has turned out, and it’s been serving me and my work well. I can’t recommend enough investing in your home office space for prime productivity and efficiency! Check out my other articles on home office design:

Designing your home office: Tips, Ideas, & Inspiration

The Three Best Lighting Types for Your Home Office

Designing Your Home Office: Window Treatments

Designing Your Home Office: The Perfect Paint Color


How to Bring Character to a Room Through Woodwork

Wood is one of the oldest materials known to architects and interior designers. Humans are connected to wood. As Donald Culross Peattie said in American Heartwood, “Wood if you stop to think of it, has been man’s best friend in the world. It held him in his cradle […] was the frame of the bed he came to rejoicing, the log upon his hearth when he was cold and will make him his last long home. It was the murmuring bough above his childhood play, and the roof over the first house he called his own.”

This versatile and hardy material is one that is not going to go out of style. In the United Kingdom, they use the term “joinery” for woodworking, especially aesthetic woodworking. It refers to the way that two pieces of wood are joined together. But the name also demonstrates the way that cleverly used wood can “join” or tie elements in a room together.

The ways you can use wood in interior design are near endless. It’s a practical, often cost-effective, and easily accessible material that looks amazing. Keep reading to find out 3 easy ways to bring character to a room through the woodwork.

Coffered Ceiling

Coffered Ceilings are a great way to add dimension and character to a room, making it appear taller and more interesting. A coffer refers to sunken panels in a ceiling, often in the shape of rectangles, squares, or circles. Coffered Ceilings date back to the ancient Greeks and Romans who used stone to create the coffers. They were a symbol of prestige and formality.

Today, the most common type of coffered ceiling is created with wooden beams crisscrossing to create geometric patterns and shapes, and the results are stunning. Painting the sunken parts of the ceiling the same color as the walls, and then painting the wooden beams the same color as the trim is a quick and easy way to tie a room together into one cohesive design. Alternatively, staining or leaving the naked wood with a simple varnish adds beautiful depth and color.

Built-Ins

Bespoke built-in units are one of our favorite things to create for our clients at Kelley Astore Interiors. We always use wood and often use glass for added texture. Wooden built-in units are such an easy way to add character, storage space, desks, TV stands, and more without taking up too much space. The combination of shelves and cabinetry provides space for decor, books, and clutter that you want to put away. The wood provides a lovely contrast in texture, and once again can be painted or designed to match the wooden trim and coffered ceilings.

This built-in unit will house a TV, books, and family pictures. It transforms the room into a truly wonderful place for the family to come, relax and watch a good movie. As we find ourselves spending more and more time at home, it’s lovely to have your TV and all the components fit nicely into one area.

Floors

Perhaps one of the most common ways to incorporate wood into a design is with wooden floors. Wooden floors are elegant, practical, and look simply amazing. No matter which wood type and color you choose, wooden floors always provide a lovely contrast to the walls. They can be dressed with rugs to section a room off.

Whether you choose to use the same type of wood on your floors as on your coffered ceiling, or you choose two contrasting tones, using wood for multiple elements in your design will automatically bring character to a room and tie a design together. In this entryway, we used the same wood for the floors as we did for the stairs and banister. Do you see how it makes the room look cohesive?

Choosing Wood & Designing

If you are looking to renovate a room and incorporate wood, be sure to check out our article on different types of wood for kitchen cabinets or anywhere in your house where you want bespoke wooden cabinetries and units.

At Kelley Astore Interiors, we work with the best craftsmen and woodworkers to help turn your dream home into a reality. Attempting to install coffered ceilings, built-in units and wooden floors can be difficult and overwhelming without proper experience and training. So let us help you! Head to our services page to book your free consultation today.


Kelley Astore Interiors

Expert Interior Design & Renovation Services of Every Style.

Where We Work

Northern Virginia, Washington, DC,
and the Greater Washington Area

GET IN TOUCH
Connect

Privacy Settings
We use cookies to enhance your experience while using our website. If you are using our Services via a browser you can restrict, block or remove cookies through your web browser settings. We also use content and scripts from third parties that may use tracking technologies. You can selectively provide your consent below to allow such third party embeds. For complete information about the cookies we use, data we collect and how we process them, please check our Privacy Policy
Youtube
Consent to display content from Youtube
Vimeo
Consent to display content from Vimeo
Google Maps
Consent to display content from Google
Call Now ButtonCall Us For A Quote!